Main menu
You are here
Programming
[last updated: 2025-05-05]
Programming for Raspberry Pi
-----
Arduino programming Tips & Techniques I wish I'd known when I started:
- Download and install the Arduino IDE (Integrated Development Environment) onto your PC. Get it from www.arduino.cc (Software > Download - though I see now July-2017 you can also edit sketches online...)
See more at: Arduino IDE - Open the IDE
- Find or create a "sketch:" This is the program that will be uploaded to your Arduino board.
Sketches have either an .ino or a .pde extension (plus maybe others...) - When you first open the IDE, or you click on File > New, a template program is loaded into the IDE. The name automatically given to this program is incremented on today's date, eg. "sketch_jul07a".
The template program is part of the IDE package that you downloaded, and is the BareMinimum.ino sketch that (at least on my PC) is located in: C: > Program Files (x86) > Arduino > examples > 01.Basics > BareMinimum
If you are going to create a sketch from scratch, then this is the template you should start with. - "Find a sketch:" If you want to start by loading and/or editing a pre-existing sketch, then find and load the sketch you want to work with.
In the IDE, File > Examples will take you to a list of Lots of programs to start with. - Create a directory/folder: for whatever project you're working on. This is where you will save this new program.
- Rename the template program: (File > Save As) to a name that lets you identify it, eg. blinkNew or whatever.
Save it into the new directory/folder you just created. - Edit your program to make it do what you want.
- See Software Management below for more tips.
- Connect Arduino to PC:
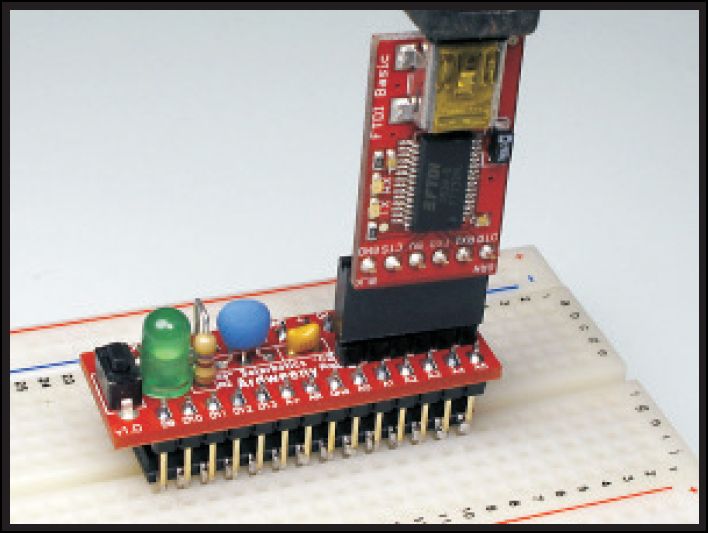
- Attach a USB cable from PC to Arduino board. Some minimalist boards may not have a USB port, in which case you connect your USB cable from your PC to a programmer, eg. FTDI-friend, which is then plugged into your Arduino.
- Select your board in the IDE: Tools > Board and select the Arduino model you are using.
- Select the port: Tools > Port and select usually whatever is there, since when you plug your board into your PC via the USB cable, the PC will assign a port (eg. COM4) to that connection, but then you must be sure it is selected in the IDE.
- Be sure the right programmer is selected (Tools > Programmer):
For most boards, select "Arduino ISP"
If using the AVRP, select "..."
If using DigiSpark or other "Tiny" boards, select "..." - Upload your sketch: In the IDE, Sketch > Upload, or click the "right arrow" icon in the top icon bar. This transfers your program from the IDE to your Arduino board.
After uploading a new program, it should automatically start running, though you may need to press reset. - Test your program: Push buttons or whatever. If it doesn't do what you want, edit it some more.
Use the Serial Monitor for troubleshooting.
---------------------------------------------
---------------------------------------------
Software management (my recommendations to keep track of things):
- Save & Verify often As you are editing the sketch/program in the IDE, Frequently click Save then Verify. This will check that you have not made any major errors in programming. As you make more edits/changes in the program, do this often. It will make troubleshooting Much easier.
- Save Where?:
- I prefer to put all my programs, programs I created or edited from wherever, into a folder that is NOT in the Arduino file structure. The thing is, when you upgrade to a new version of Arduino IDE, anything that is in the Program Files (x86)/Arduino structure will be replaced with the new version. If you've put your personally created sketches there, you'll lose them.
- But... You can put your personal sketches into the Sketchbook folder... [more explanation later...]
- Revision Control:
- This is just the way I do it...
- When I am in the process of creating/editing a program, as recommended above, I save and test it often. Whenever I do that, assuming it works, I evaluate where I'm at in the overall editing process, and if I'm at any kind of milestone in the coding, or if the next thing I have to code is particularly difficult (eg. deep into my learning curve), then I will save-as and create a new program to continue editing.
- For example, let's say I'm creating a program to do a task, and I've started by naming the program "doTask". Now suppose I have the basics programmed, the setup and major variables defined perhaps, maybe some portion of the loop, but in any case what I have so far compiles and works. I save it with the doTask name, then I will save-as and create a new program eg. doTask-01. Then I'll continue editing the doTask-01 until I've finished some other perhaps major section, and after saving and testing, will again save-as and create an incremented program, doTask-02.
- I'm just sayin', it will happen that you'll reach some successful point, and if you don't save it there and continue editing a new program, it will happen that you'll do a lot of coding before trying to get it to compile again, and if you've done too much coding since it last worked, and now you find you've made some error and it won't compile, then troubleshooting to figure out what you did wrong can be a pain, and result in you having to start over from even before where you were at when you last had it working. I'm just sayin' ...
---------------------------------------------
There are a variety of methods to upload your sketch to your Arduino board. Not all methods work on all boards
- Here's a list of Arduino boards and the upload methods that can be used on them.
- USB - plug USB into your PC, connect to Arduino boards equipped with plugs
- Select: Tools > Board > [Uno or whatever]
- Select: Tools > Port > [generally whatever is listed, though the listing will often say "Arduino [whatever]"
- Select: Tools > Programmer > ArduinoISP
- Select: File > Upload
- If you fail to upload due to avrdude content mismatch errors, re-try. I have had eventual success sometimes after 4 or 5 tries, with no changes in between.
- FTDI:
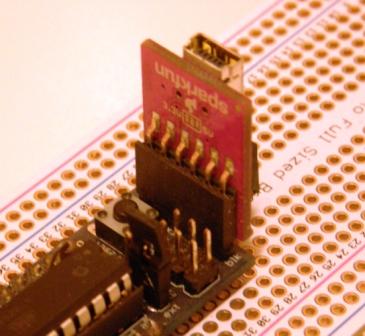
- There are several FTDI programming boards available.
Be careful because some are selectable for either 3.3 or 5v.
I have a 5v FTDI Basic from SparkFun DEV-09716.
- There are several FTDI programming boards available.
- AVR Programmer
- Program an Arduino from another Arduino:
---------------------------------

