Main menu
You are here
rPi touchscreen
[last updated: 2026-03-27]
raspberry Pi home page
GMC UI project
-----
From Newark Element 14 (link to:) Newark
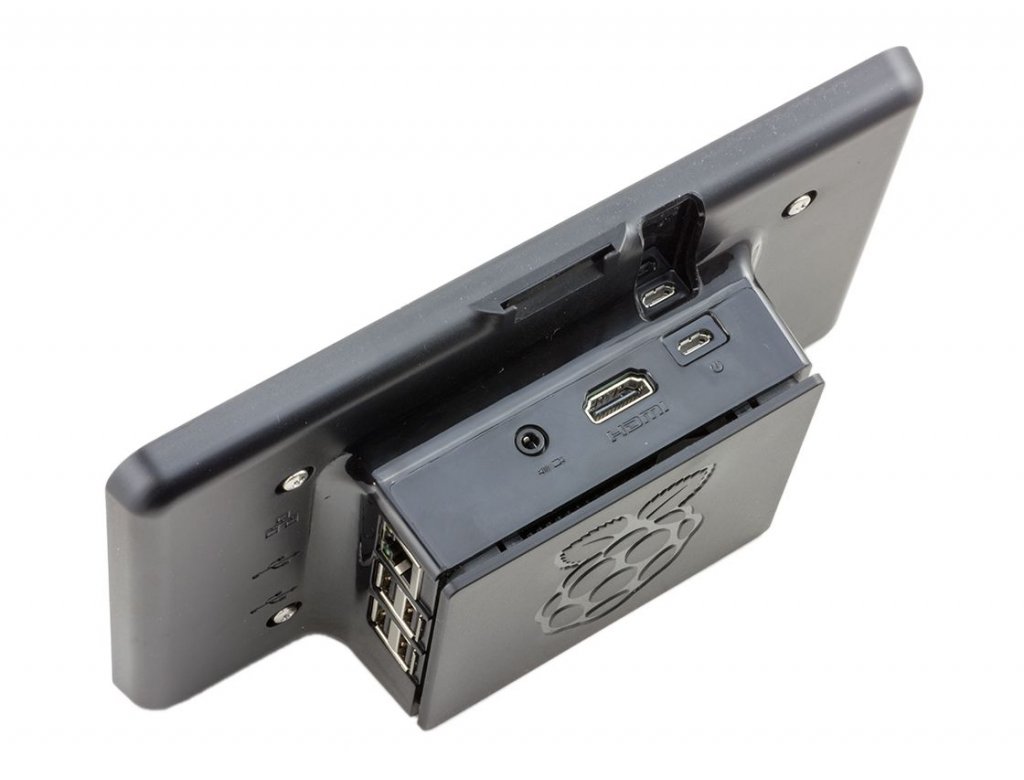
- The touch screen comes with the screen, an "adapter board" and associated cables.
- The case must be ordered separately. Several versions are available online. Search google. I got mine from some unknown source through Amazon.
Note: Assembling the rPi into the touch screen case was fairly easy, but getting it back out for whatever reason is tricky:
Remove screws, then on screen side of assembly, insert fingernail between edge of touch screen and the case. Slide fingernail around until entire perimeter releases. - The adapter board is attached to the back of the screen, and the rPi is mounted on top of the adapter board.
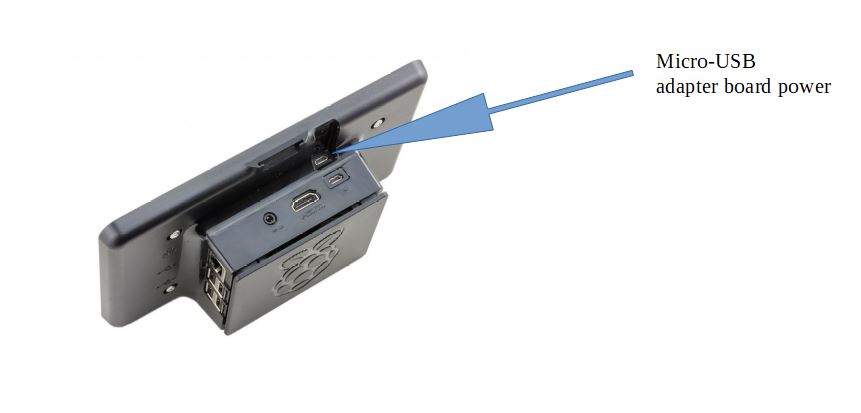
- The adapter board has a micro-USB slot for power. If a (recommended 2a) 5v supply is connected here, it will power the screen, adapter board, and the rPi.
- OTOH:In developing programs, when I'm repeatedly switching back and forth between a full-size HDMI monitor and the 7" touch screen, I have powered everything with the micro-USB on the rPi, letting the jumper between the rPi and the adapter supply power to the screen. It's worked without issue.
- If instead of using the touch screen, you want to connect the rPi to a larger monitor via the HDMI port, you must disconnect the touch screen, as you can't use both the touch screen and the HDMI output at the same time.
- Remove the red power jumper that connects power from the adapter board to the rPi. (the gnd jumper can remain)
Apply power to the micro-USB power connector on the rPi board itself (above the micro-USB that powers the adapter board). - For keyboard/mouse input, I use an IOGear 2.4 gHz wireless compact keyboard (IOG-GKM681R). It uses a dongle plugged into one of the rPi USB ports to communicate. The dongle is marked: QLERXGKM681R
- To rotate the display 180deg,
enter: lcd_rotate=2
into /boot/config.txt
See also: rPi home page ... Operation/Display ...
------------------------------------------------------------- - Setup/Connections/Startup:
- As noted, the screen comes with an "adapter board" attached.
- The rPi is mounted above the adapter board on standoffs.
- You must connect the rPi and the adapter board using a 15-pin "DSI" ribbon cable.
- There are locking tabs on each end of the connectors on the rPi and the adapter board
that you must lift up (with your fingernail) to release, then after you've inserted the ribbon, push them back down to lock. - The end of the ribbon that goes into the adapter board has its contacts facing away from the display.
- The end of the ribbon that goes into the rPi has its contacts facing towards the rPi.
- There are locking tabs on each end of the connectors on the rPi and the adapter board
- Connect power and ground jumpers from the rPi to the adapter board,
or power the adapter and rPi separately, each with its own supply (micro USB).
If powered with separate supplies,
it seems as if...you must power on the display before powering the rPi. - The jury is out on displaying on the touchscreen at the same time as a monitor plugged into rPi HDMI port.
I tried it, and both screens displayed, however the screen size was off the screen of the touchscreen,
and in limited attempts I could not get the cursor to show and move on the touchscreen.
.
.
.
eof
Powered by Drupal